It’s easy to personalize your account.
This guide is designed to help you set up basic account preferences.
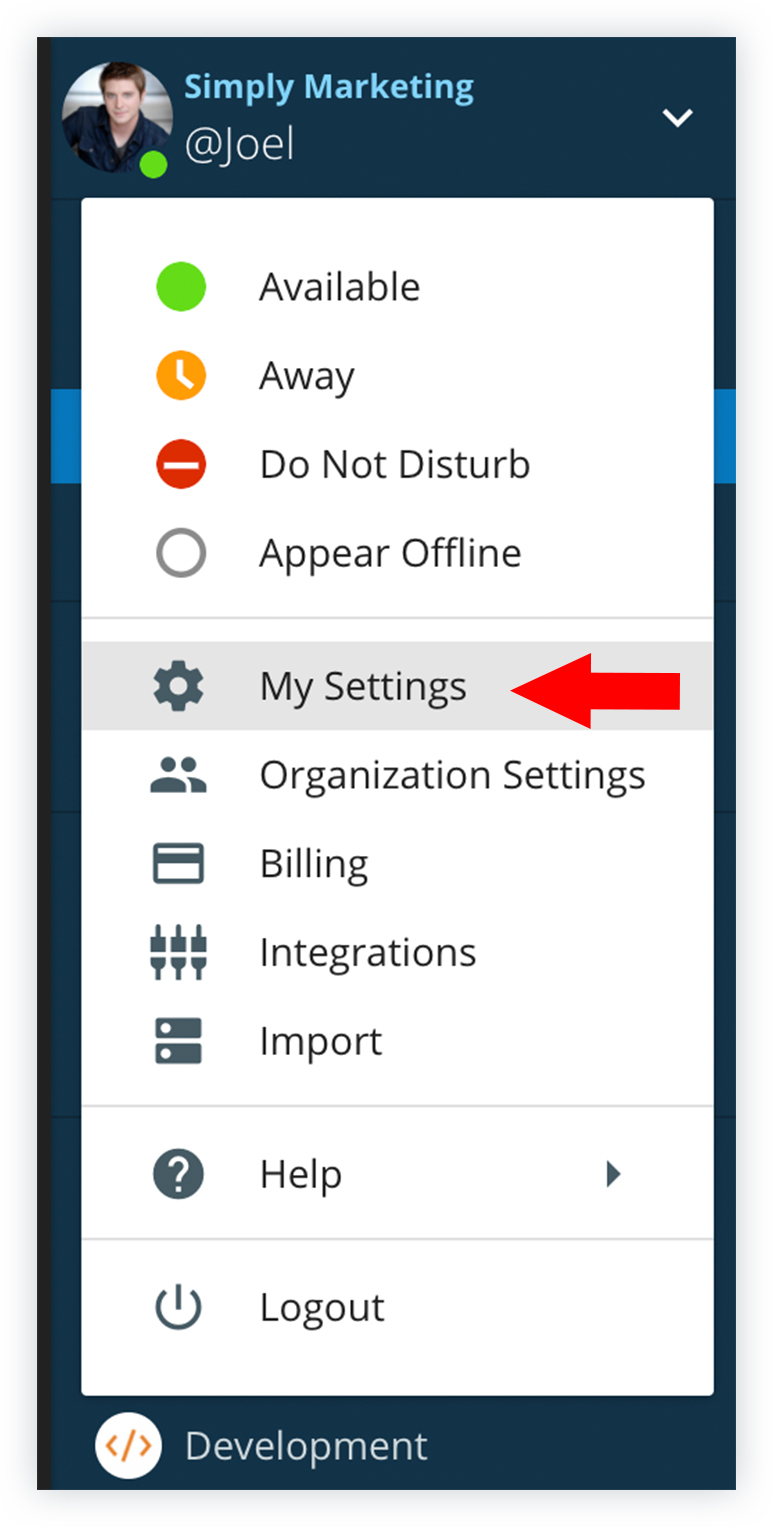
My Settings
User account preferences can be updated in the “My Settings” section of the User Menu, which can be opened by clicking on the username located on the top, left side of the screen.
Simply click the drop-down arrow at the top of the Navigation Bar. Then select “My Settings” (pictured below).
Once the “My Settings” window opens, you will be presented options for personalizing your “Preferences”, “User Account”, “Profile”, and “Notifications” settings.
Below, we cover each of these items in basic detail. If you’d like more info on any of these sections, please visit the “User Settings” page.
Preferences
The “Preferences” tab in “My Settings” has a large number of options for updating the look and feel of your Ryver™ account profile.
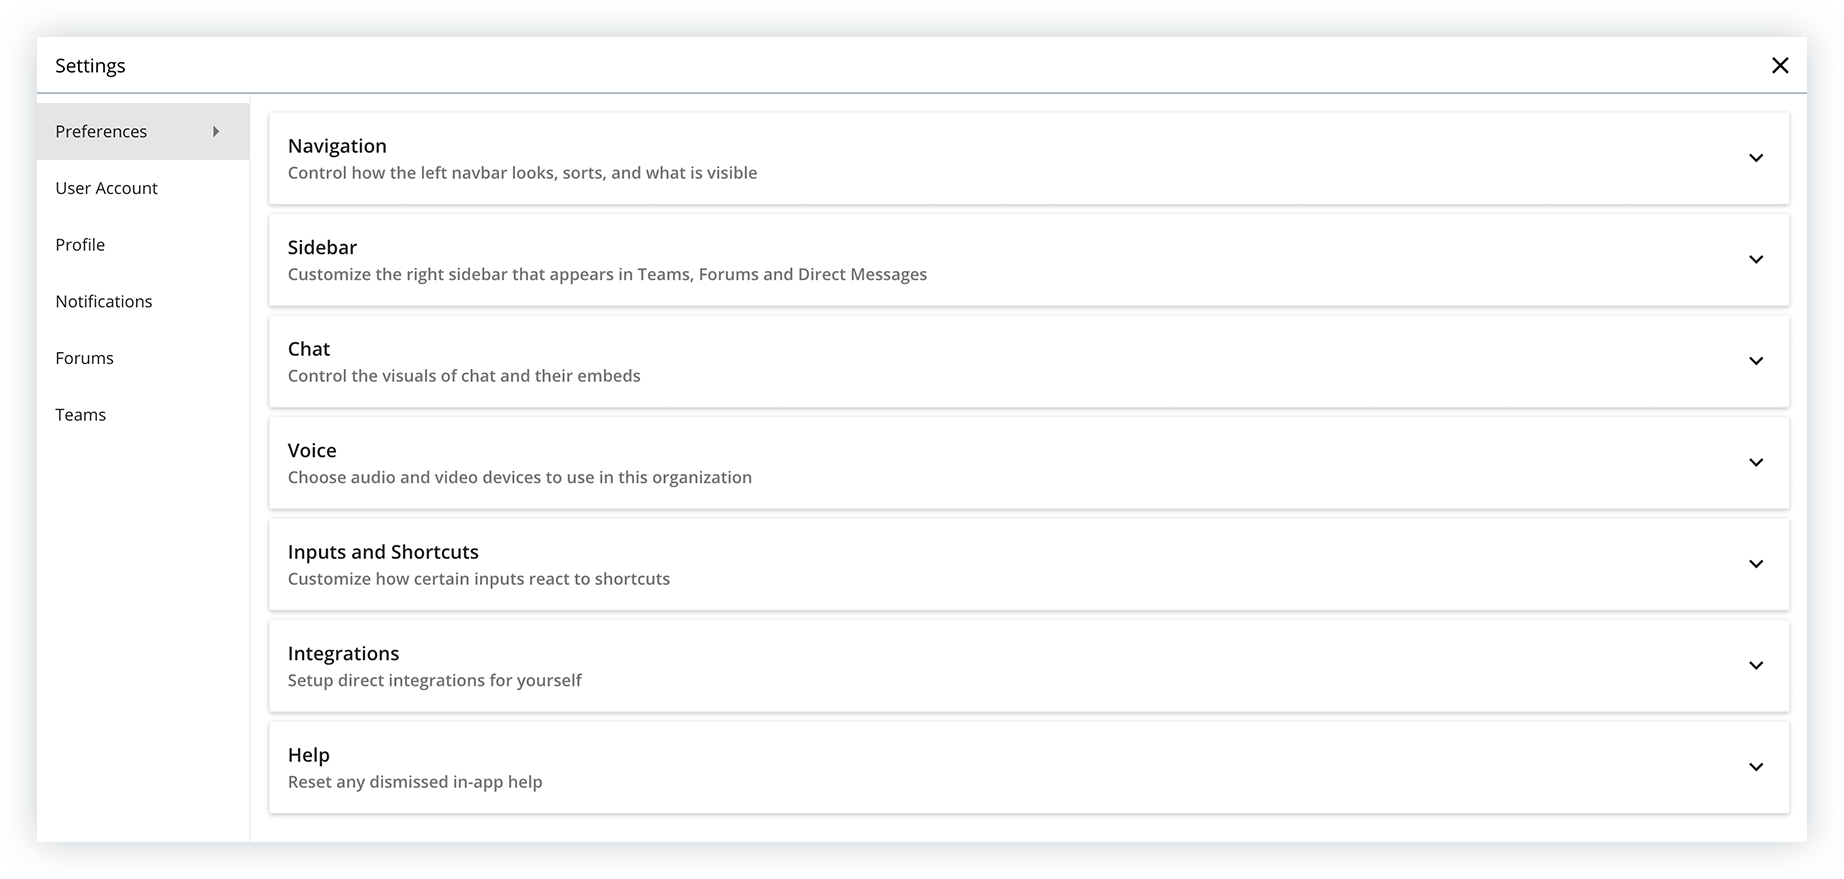
A few initial updates you may want to make include:
- Ryver Theme: In the “Navigation” section, you can update the look of your Ryver account by choosing one of three different Ryver™ themes: Light, Light with Dark Navbar (enabled by default), and Dark.
- Text Size: You have the option of enlarging the size of text displayed in Ryver to a “Larger” or “Largest” size, as desired.
- Hide Nav Bar Items: You can choose to show or hide Nav Bar items, including “Search”, “Topic Stream”, “Task Stream”, and your “Personal Task” board.
- Chat View Layout: In the “Chat” dropdown menu, you can choose to keep the standard chat layout or select the “Compact” option for a more streamlined look with your chat window.
For a more detailed look at account preferences, please head to [LINK].
User Account
Within your “User Account” (pictured below), you can update your personal account details.
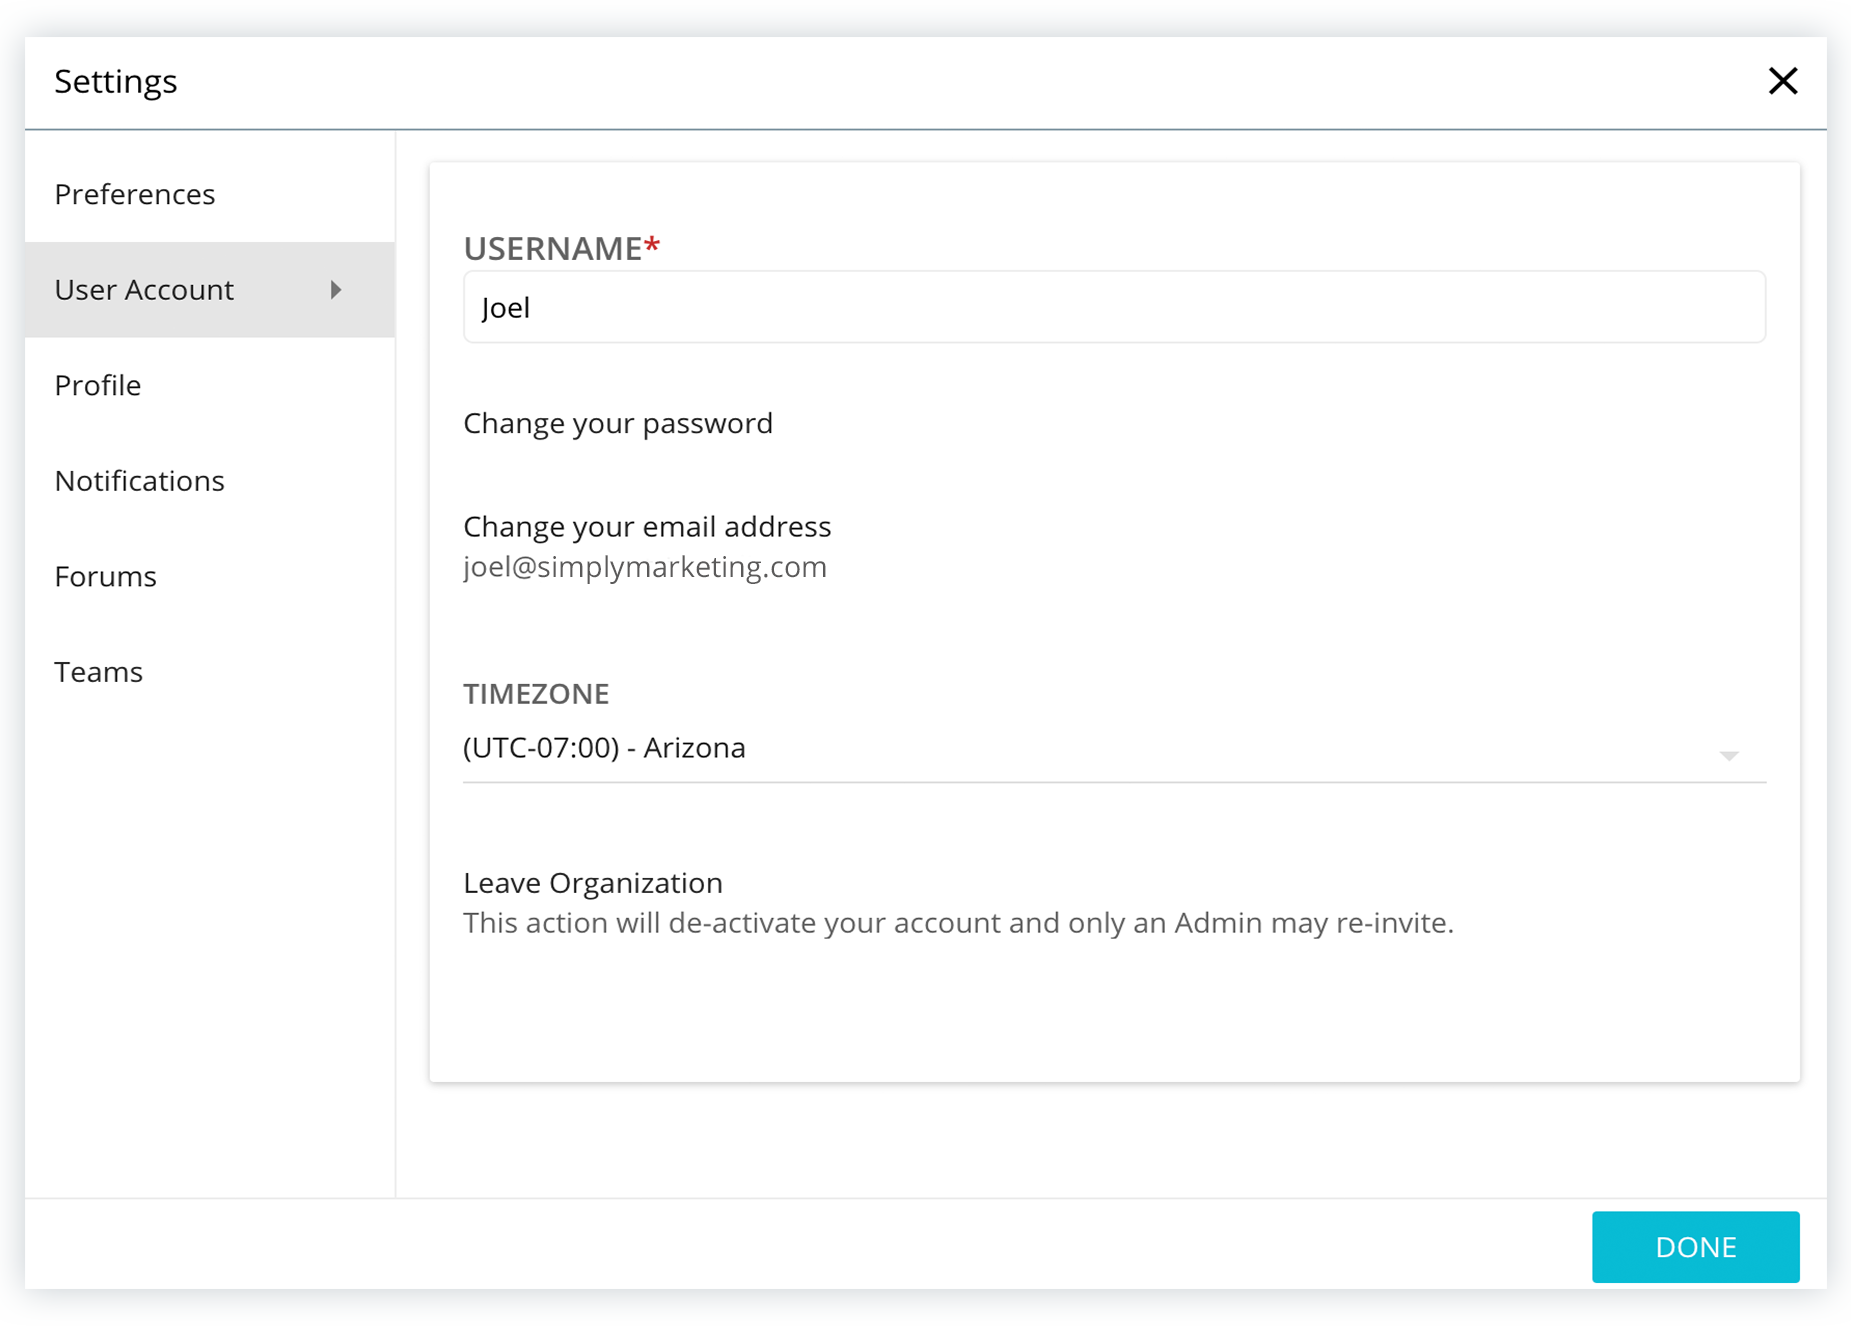
Settings that can be updated include:
- Username: Your Username is the personalized name that other users can use to “@mention” you in Ryver. Typing “@[username]” into a message will send a notification to the user you “@mention”.
- Password & Email Address: You can update your account password or email address here if you’d like to do so. NOTE: Your email address and other users’ email addresses in your Organization do not all need to have the same domain name (i.e. “@[domain-name]”); a user can use any email address.
- Organization Membership: Select the “Leave Organization” option to deactivate your User Account. If your account is deactivated, only an account admin can re-enable your account.
Profile
The “Profile” section of “My Settings” (pictured below) provides options for customizing how your data will appear to other users within your organization.
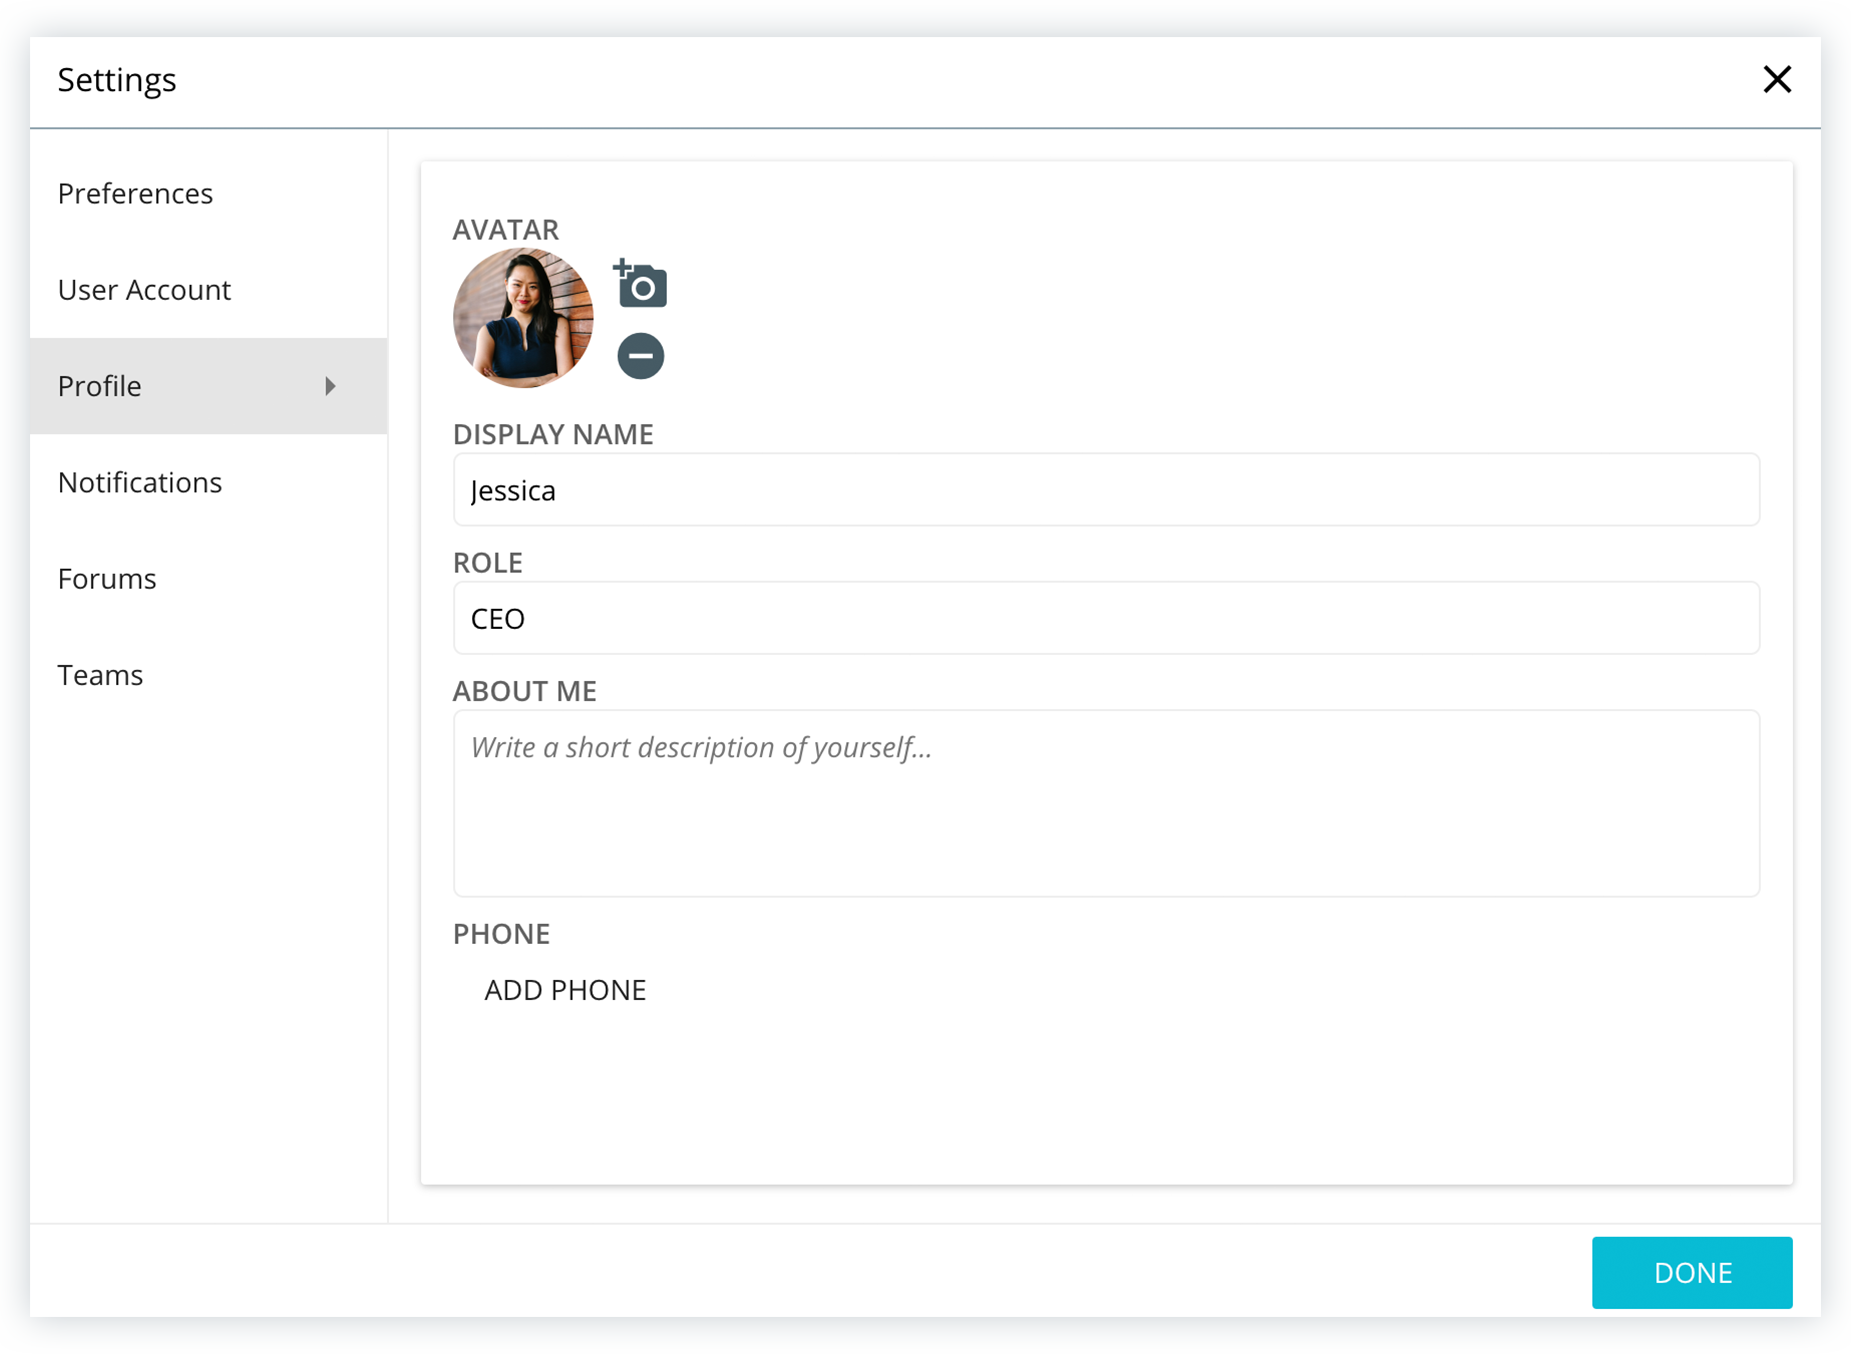
Customization options include:
- Avatar: Upload or remove (after upload) your own personal Profile image. Accepted formats include .jpg, .png, & .gif. The maximum file size is 32 MB, but we recommend uploading images under 5 MB to make the upload process go quickly.
- Display Name: Unlike your Username that is used for logging in and @mentions, your display name can be customized to any other name you want. Your display name is shown next to your activity in the organization including posts or comments you make, tasks you’re assigned to, etc.
- Phone Number: You can list a phone number for other users to contact you outside of the Ryver system.
Notifications
Updates to your notification settings can be made in the “Notifications” section (pictured below).
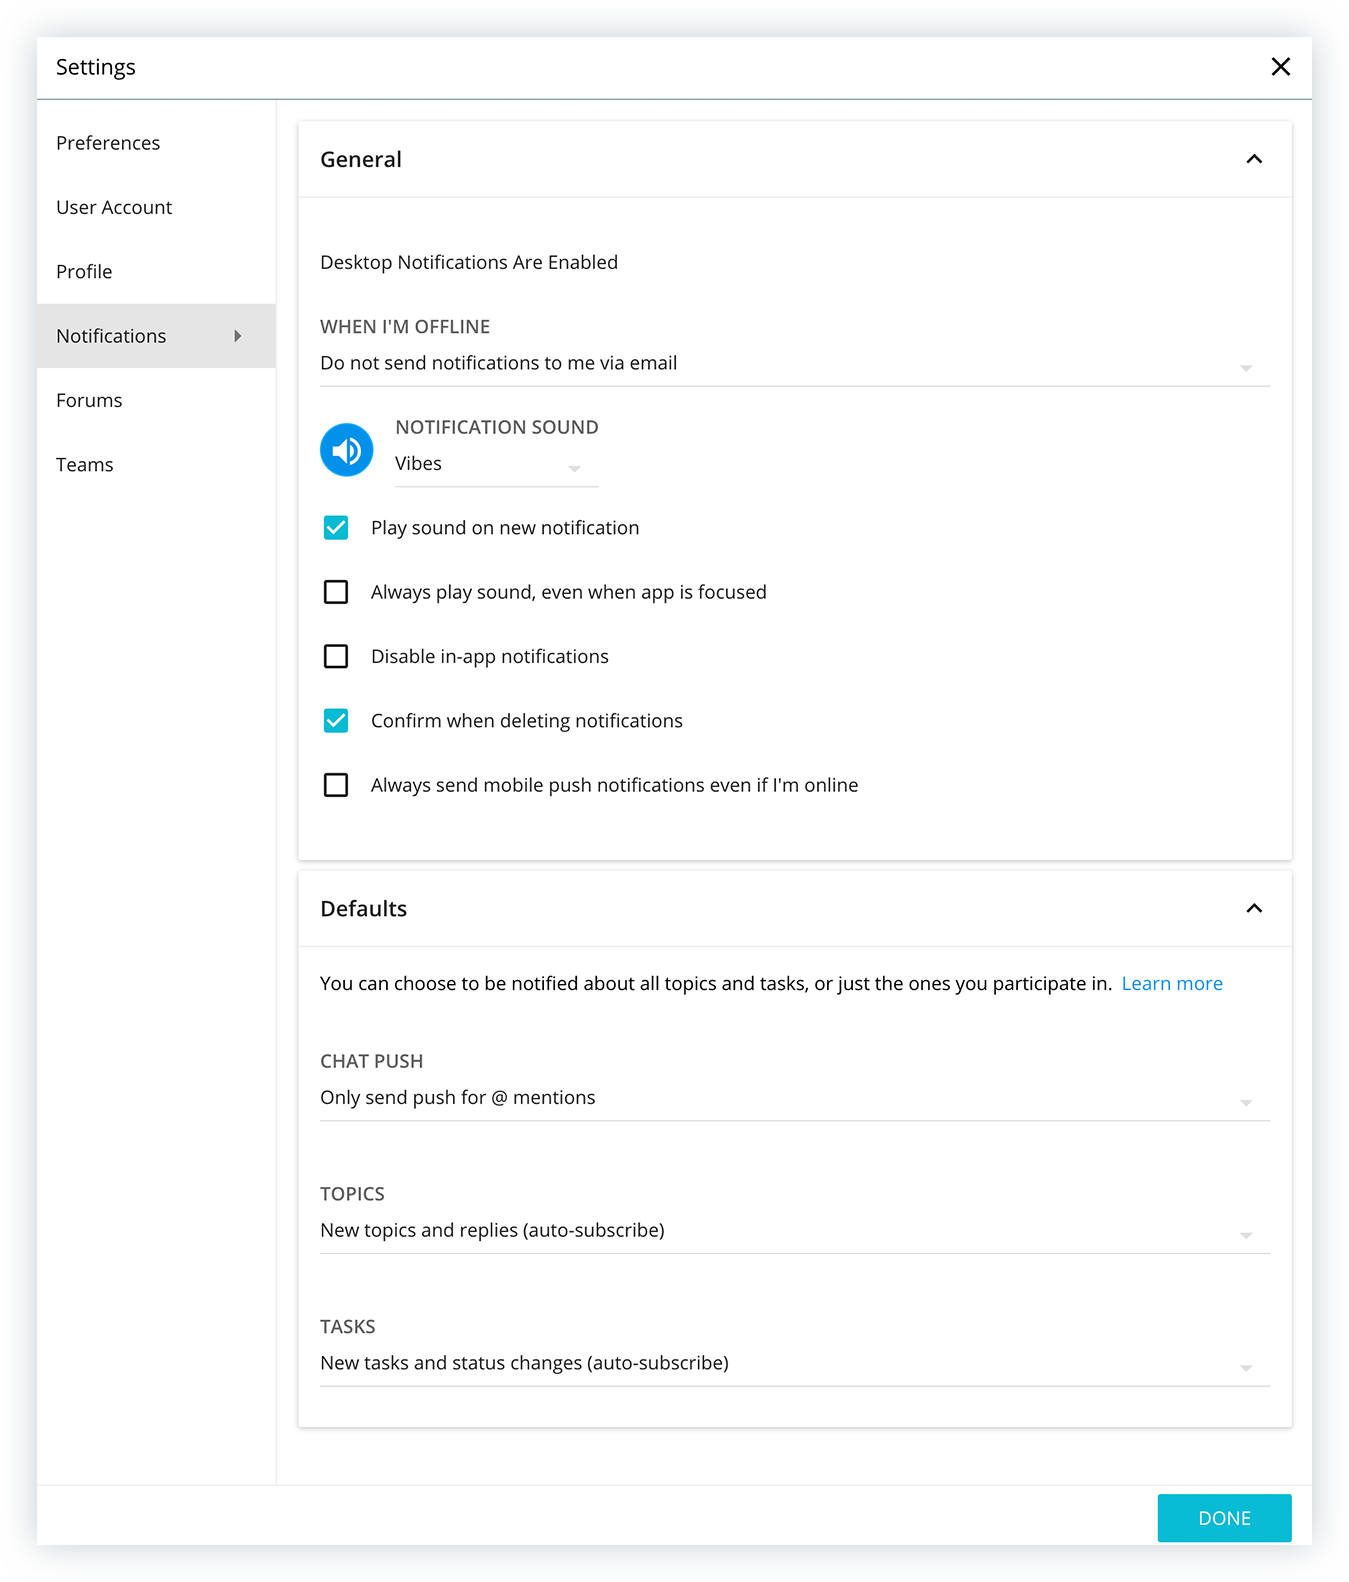
Options for personalizing your settings include:
- Desktop Notifications: Enable or disable receipt of desktop notifications from Ryver™.
- When I’m Offline: Update your preference for being notified via email when you are not logged in to your account. If enabled, you will be sent a notification email when you get a new direct message, are @mentioned, if a new post is added to a Team or Forum you are subscribed to, or when a comment is added to a post you have pinned or are subscribed to.
- Play sound on new notification: You will receive a notification sound when you get a new notification. If you are accessing your account through a browser tab (instead of the Desktop app), this includes when you switch to a different browser tab.
- Disable in-app notifications: Selecting this preference will disable receipt of any notification in-app. You will still receive push notifications and emails.
- Defaults: In the “Defaults” section, you can specify which items will provide a notification. Chat Push can be customized to provide notifications for all chat messages or only for @mentions. Topics & Tasks can be customized to allow for notifications when a new item Topic or Task is created, when they are created or updated, or only when you are participating in the Topic or Task.
For a more detailed look at account notification settings, please head to our Notifications Overview.