The free version of Ryver Team Communication now includes unlimited access to Personal Tasks! This is a great way to manage/prioritize things you need to take action on. You can create tasks directly, or from content in your Ryver organization such as chat messages or posts. Organize your tasks as a simple list, or as a “board” with task cards that you can drag between category columns.
Getting Started
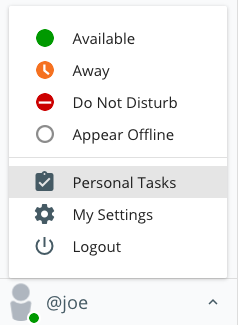
You can access your personal tasks by clicking your username at the bottom of the navigation bar and selecting Personal Tasks from the menu. This will bring up your own user under Direct Messages (or favorites if you have favorited yourself), where you now have a TASKS sub-tab, in addition to your personal chat room.
You need to setup/initialize your Personal Tasks viewing preference before you can start creating tasks. Choose to “Browse” from a set of pre-defined templates, or select “Custom” to choose list or board mode.

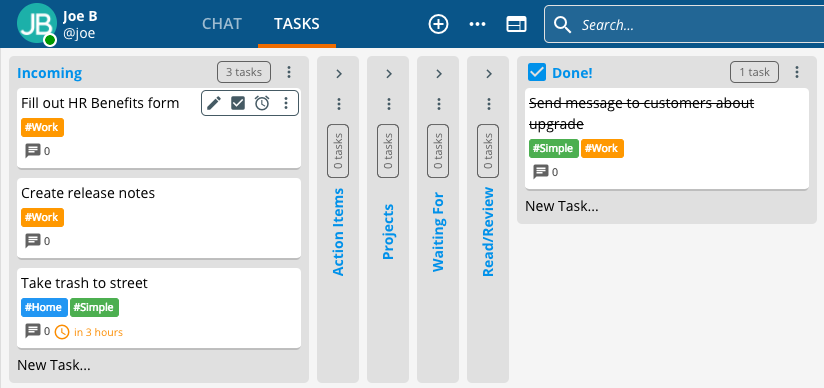
The image at the top of this article shows a “Task Board”, selected form the templates (Get Stuff Done!). For the next steps, I’m going to select Custom, and then simple list mode, which results in an empty task list.
![]()
Click on the New Task… text in the empty list to “quick add” your first task.
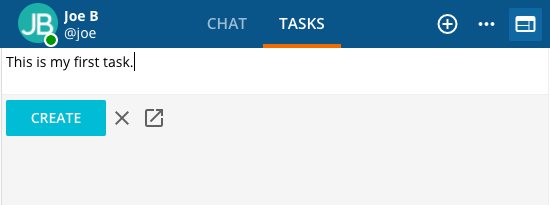
Once in “quick add mode”, you can just type some text, hit enter (or click the Create button), and enter another task repeatedly.
Note: You can sort tasks by dragging/dropping them within the list. If you are in board mode, you can drag within a category, or between categories.
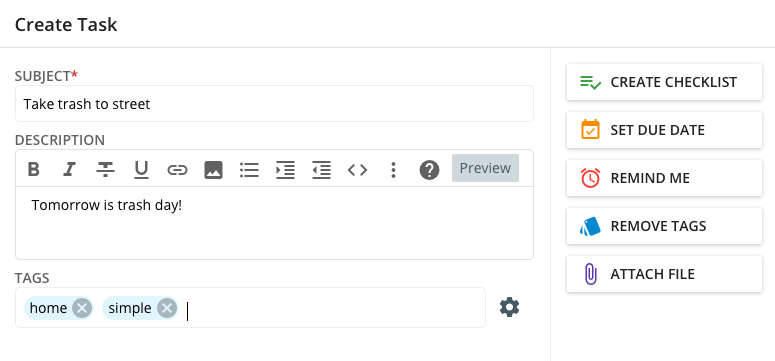
If you click on the icon button to the right of the “quick add” Create and X buttons (the one with the square and the arrow), it will open up a full Create Task dialog where you can enter additional details, and attach things like files, a checklist, and tags. Clicking on the + button up in the blue header will also open up the Create Task dialog.
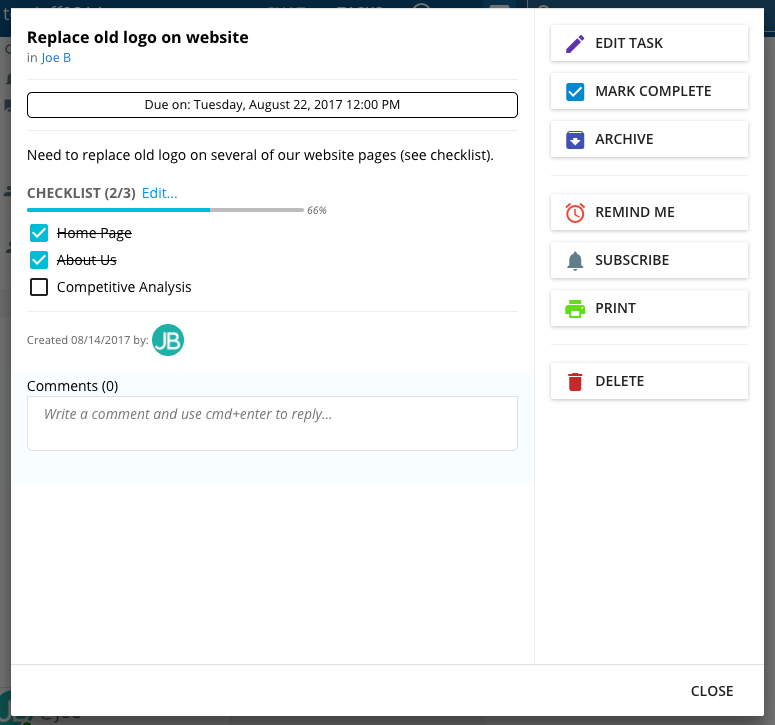
Click on a task in your list to see the details:
Tags
When creating a task with the Create Task dialog (or when you edit a task), there is a Tags field where you can enter single word tags to provide flair to your task. You might want to sub-categorize your tasks this way, or give them a special designation.
Tags are much more useful when you can quickly distinguish between them, so Ryver allows you to format your tag colors. Click the gear icon to the right of the TAGS field to define a set of tags and their associated colors.
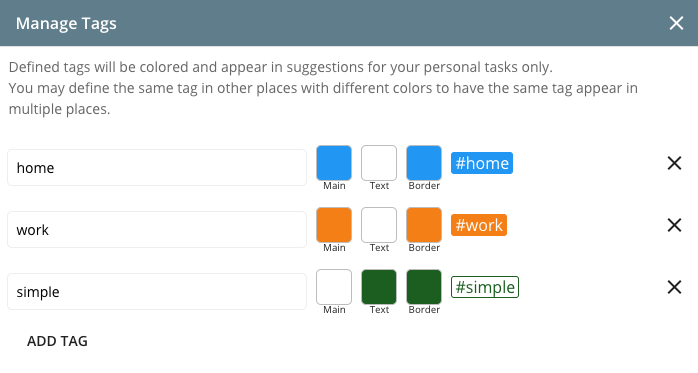
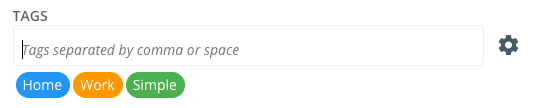
These tags will now show up below the tag field for one-click adding of your tags in the future. You can still add new tags on the fly by typing them in a tags field, but the set of tags defined in “Manage Tags” will show up as “suggestions” for quick data entry.
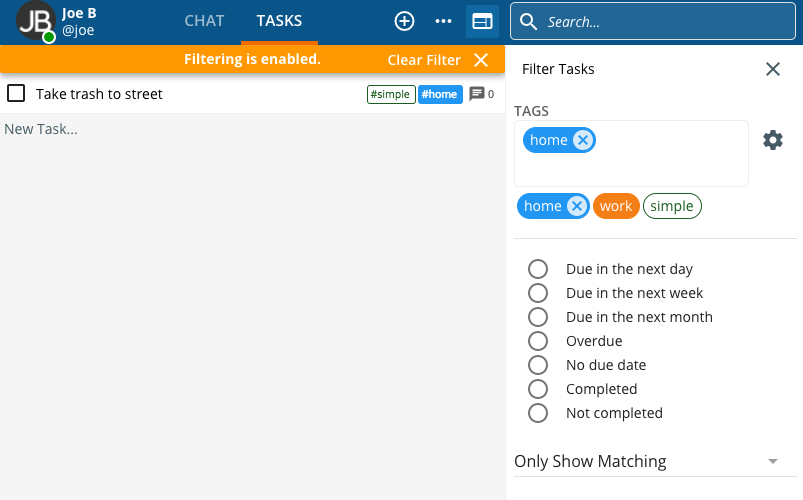
Filtering your tasks
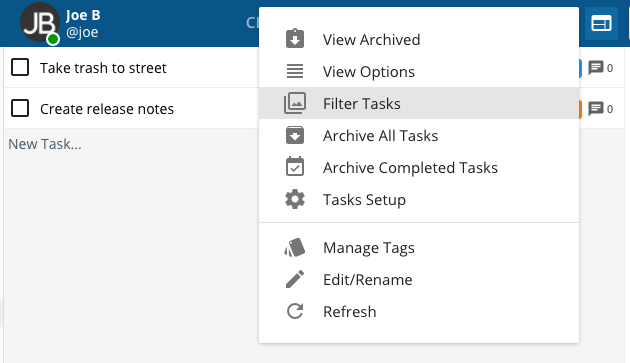
If you have a lot of tasks on your list or board, you might want to use the Filter option to more easily browse a subset of your tasks. Click the ellipses button up in the header when you are on your TASKS sub-tab, and select Filter Tasks.
This will bring up a side bar with a number of filtering options. At the bottom of the side bar, you can choose from hiding the filtered out tasks, or just graying them out (the default) so that you can see where your target tasks are located in relation to the other tasks. In this screen shot, I have the filtered out tasks hidden: